Building a Virtual Security Home Lab: Part 5 - Cyber Range Setup
A step-by-step guide for building your very own Cybersecurity Home Lab using VirtualBox
Banner Background by logturnal on Freepik
Hacker Image by catalyststuff on Freepik
Virtual Machine images present online come in 2 formats - .vmdk (Virtual Machine Disk Image) or .ova (Open Virtualization Format). In this module, we will step up some vulnerable VMs on the CYBER_RANGE interface which we can then access using Kali Linux running on the LAN interface. We will also see how to import .vmdk and .ova images into VirtualBox.
Boot the pfSense VM if it was turned off before proceeding with the below setup. Once pfSense is up start the Kali Linux VM as well.
VM 1: Metasploitable 2
Download Metasploitable 2
Go to the following URL: Metasploitable: 2 ~ VulnHub and download Metasploitable.

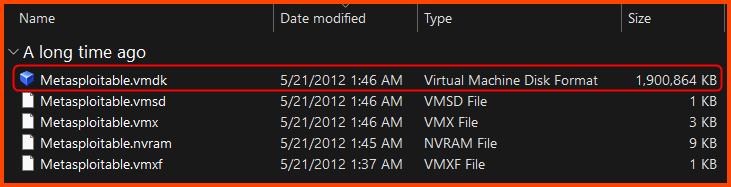
The download is a compressed file (.zip). Use an extraction software like 7-zip to decompress the file. After extraction, we should have a folder.

The folder will have multiple files. We only require the .vmdk file.
Creating the VM
Launch VirtualBox. Select Tools from the sidebar, then click on New from the toolbar.

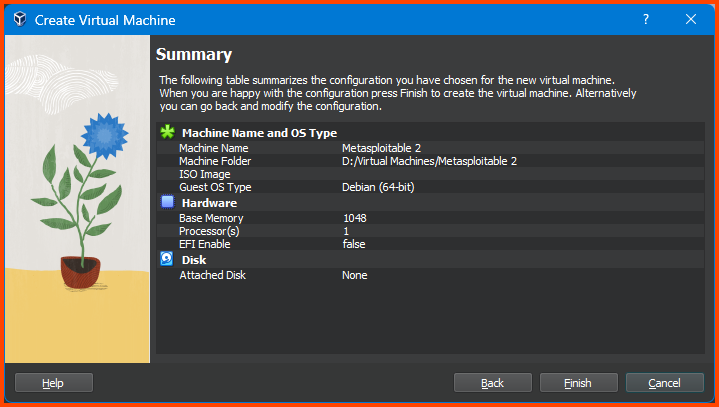
Give the VM a name. Ensure that the Folder is set to the location where all the VMs of the Home Lab are going to be saved. Leave the ISO Image option empty. Select the value for Type and Version as shown below and then click on Next.
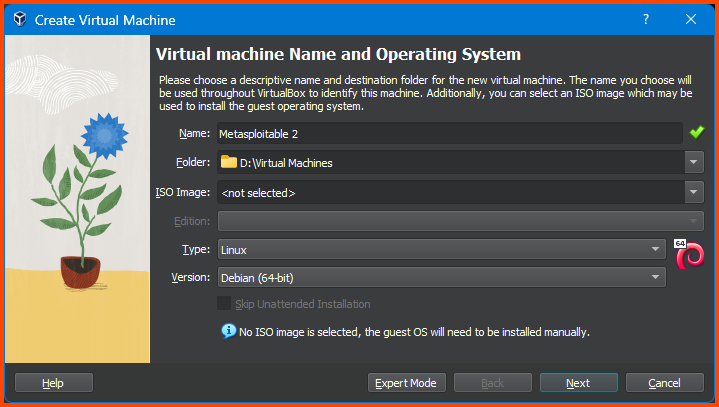
The sites from which the VM images are downloaded will in most cases have details on OS type and Version that can be used in VirtualBox
Reduce the Memory to 1024MB and click on Next.

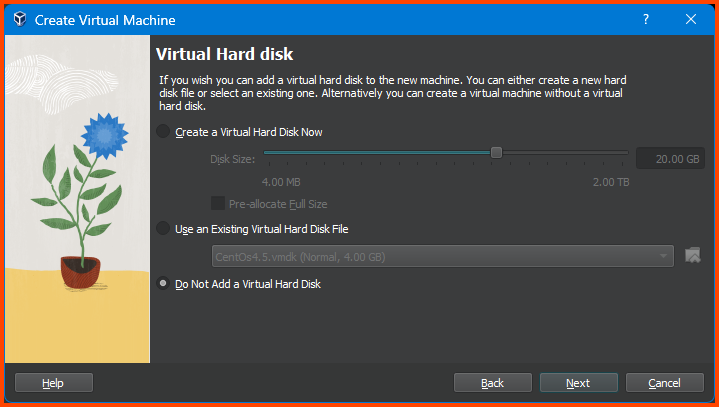
Select “Do Not Add a Virtual Hard Disk” and click on Next.
The
.vmdkfile we downloaded is the Hard Disk. The OS is pre-installed on it. In the next step we will see how to attach to it to the VM we are creating.
Confirm that everything looks correct and click on Finish.
You will get a Warning as shown in the below image. Ignore it and click on Continue.

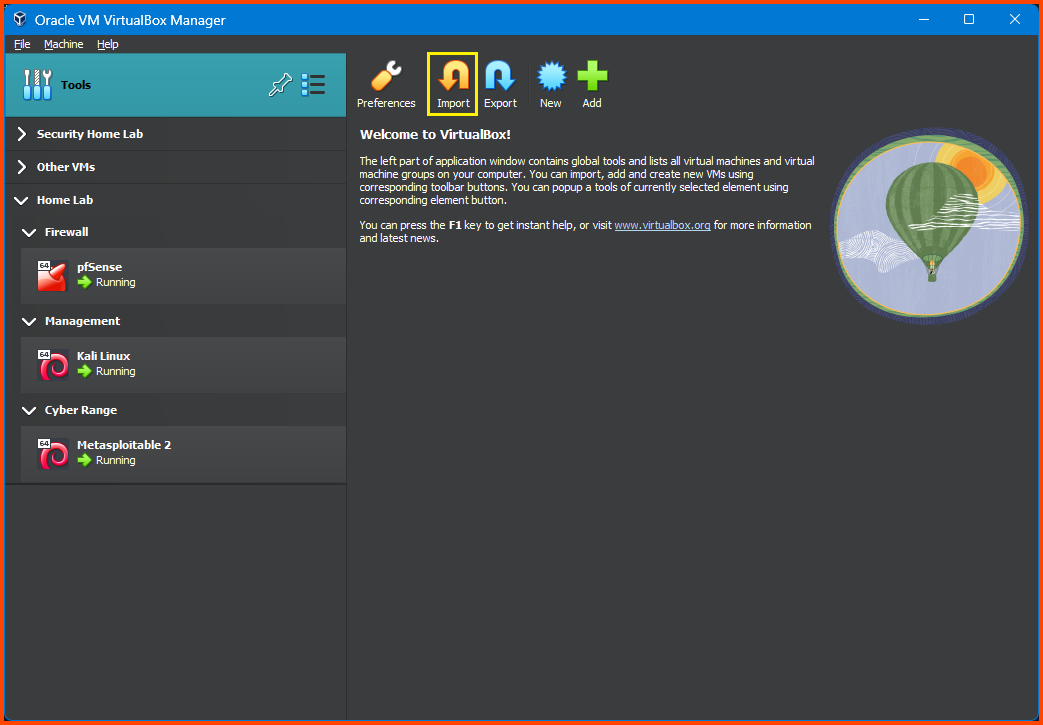
Adding VM to Group
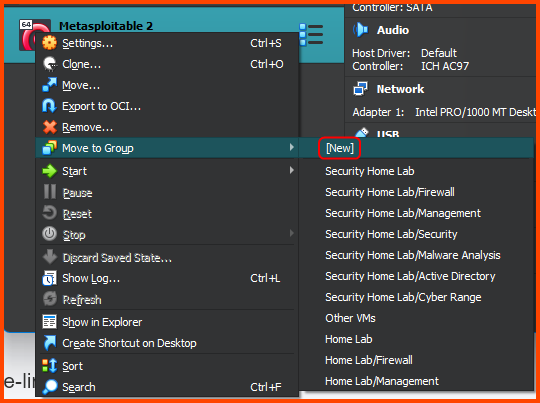
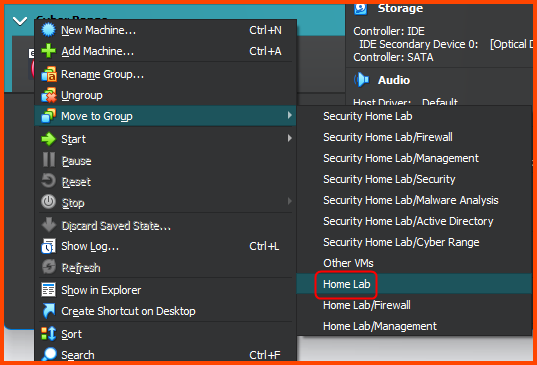
Right-click on the Metasploitable VM. Select Move to Group -> [New].
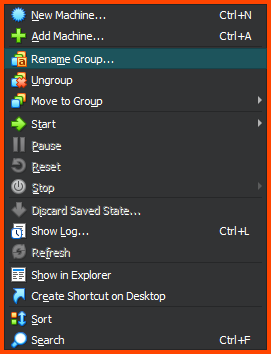
Right-click on the group that is created and select Rename Group. Call the group Cyber Range.
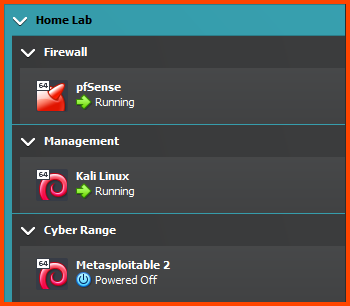
The output should look as follows:
Right-click on the Cyber Range group and select Move to Group -> Home Lab.
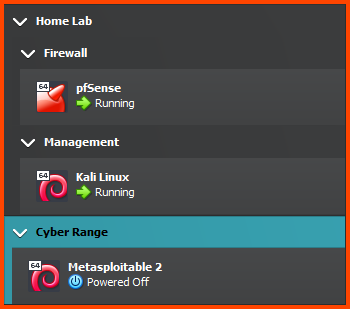
The final output should look as follows:
Configuring the VM
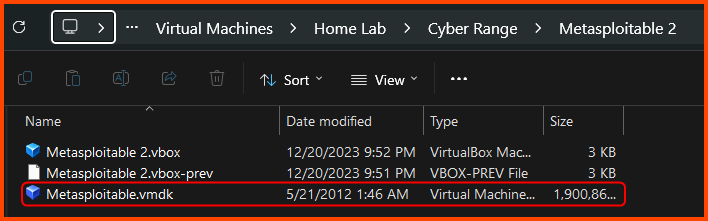
All my VMs for the Home Lab project are located in D:\Virtual Machines. Whenever we create a new group in VirtualBox a corresponding folder is created is created on the filesystem to store the VM.
Since the Metasploitable 2 VM is in the Cyber Range group which is nested inside the Home Lab group the location of the Metasploitable VM on my Hard Drive will be D:\Virtual Machines\Home Lab\Cyber Range\Metasploitable 2.
Find the Metasploitable VM folder location in your case and move the downloaded .vmdk into it.
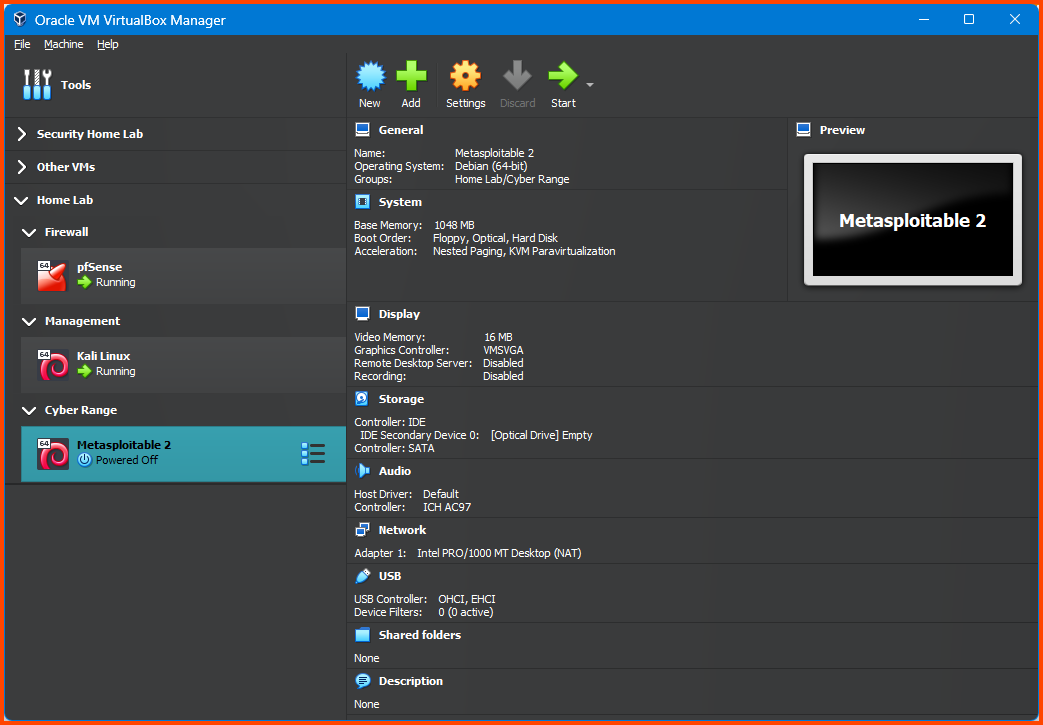
Select the VM from the sidebar and then from the toolbar click on Settings.
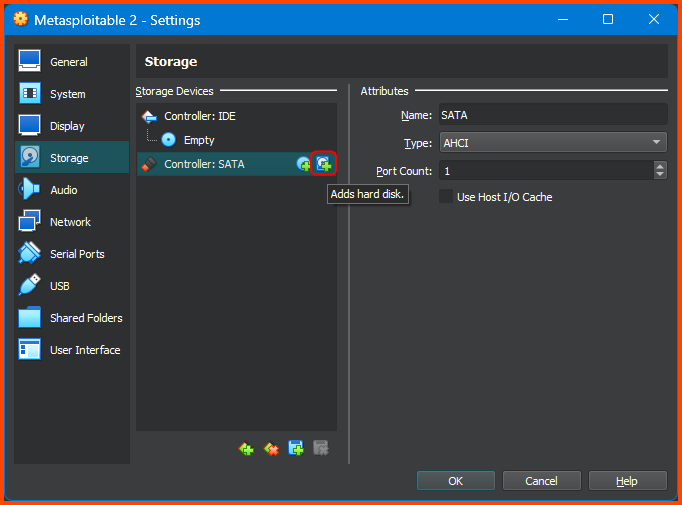
Go to Storage and select Controller: SATA then click on the small “Add Hard Disk” icon on the right.
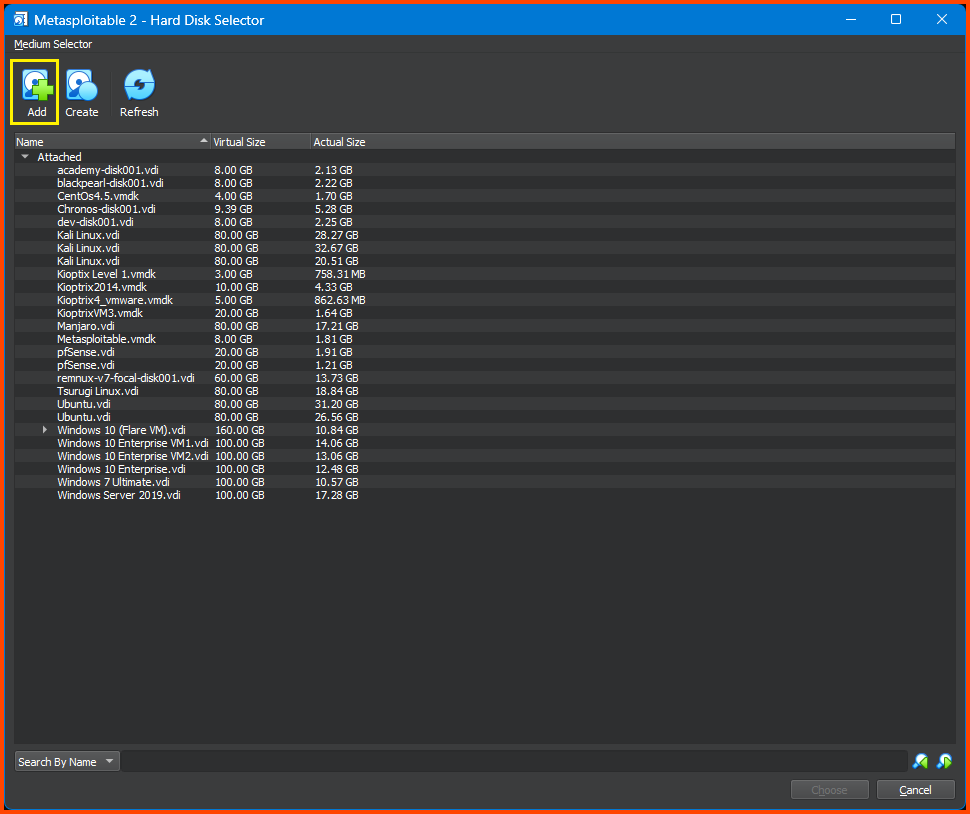
This will open the Hard Disk Selector menu. Click on Add and then select the .vmdk file. Then click on the Choose button to use the Hard Drive.
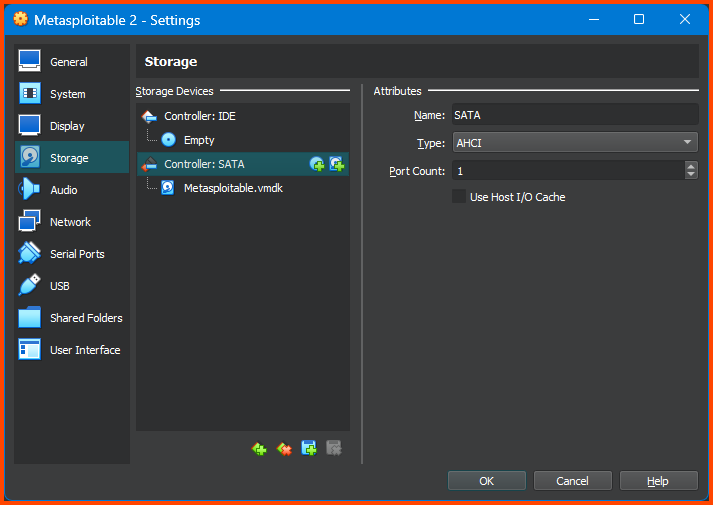
If done correctly under Controller: SATA the Hard Disk will be visible.
Go to System -> Motherboard. For Boot Order ensure that the Hard Disk is on the top followed by Optical. Disable Floppy.

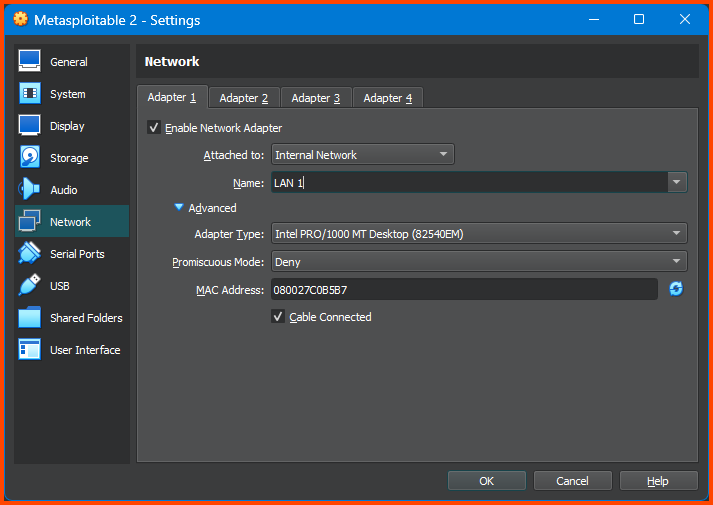
Go to Network -> Adapter 1. Change the Attacked to field to Internal Network and in Name select LAN 1. Click on OK to save the changes.
Testing Connectivity
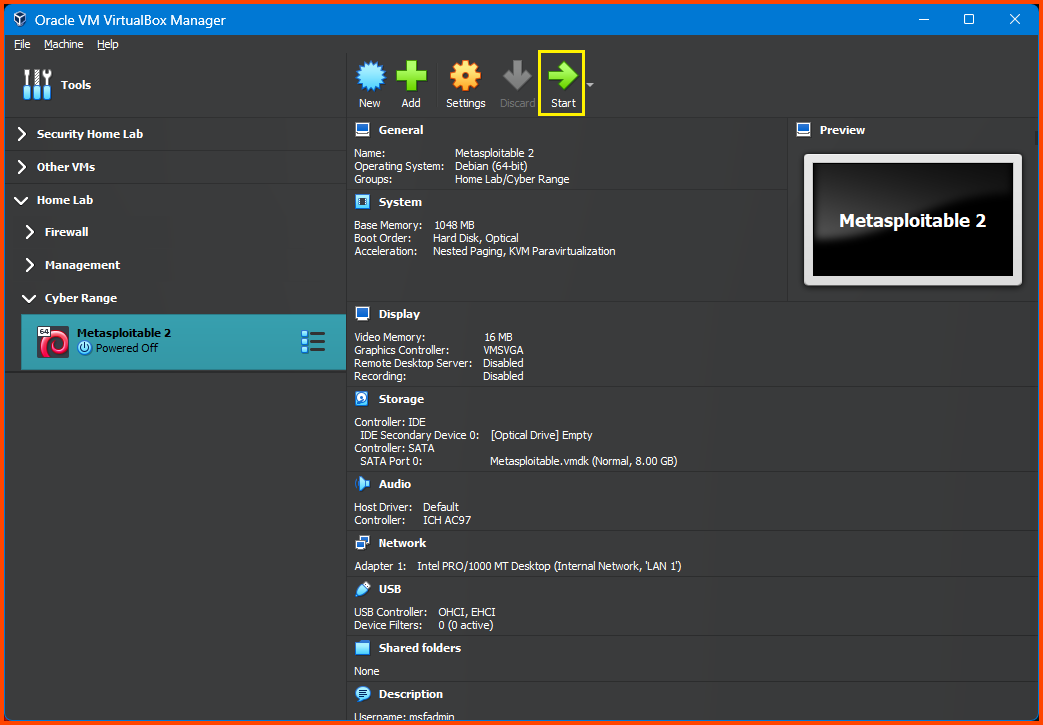
From the sidebar select Metasploitable 2 and then click on Start.
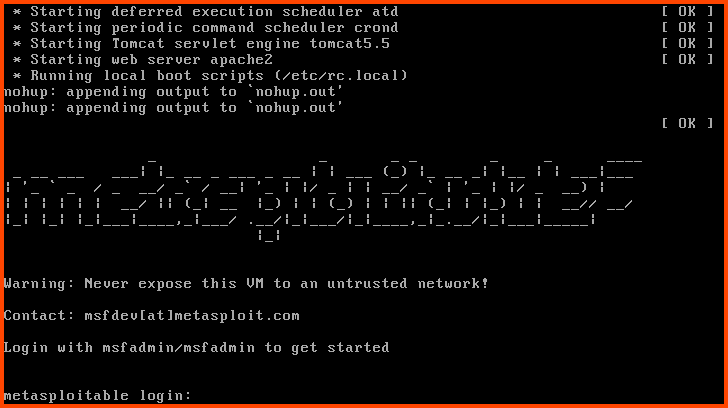
Once the VM boots use the following credentials to log in.
Username: msfadmin
Password: msfadmin
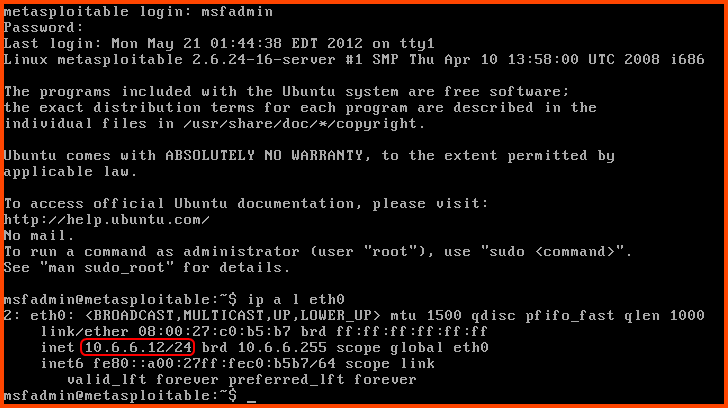
After login use the following command to check if we have an IP address:
1
ip a l eth0
We can see that we have been assigned the IP 10.6.6.12 (IP may be different in your case) which we know is inside the DHCP address range for the CYBER_RANGE interface.
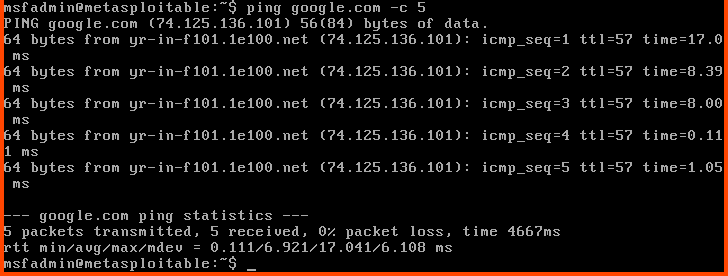
We can ping Google to test if we have an Internet connection.
1
ping google.com -c 5
We can do a similar test to check connectivity to the Kali Linux.
1
ping 10.0.0.2 -c 5
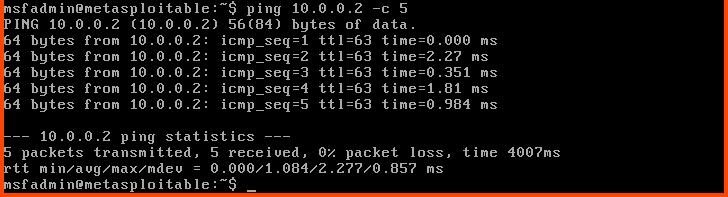
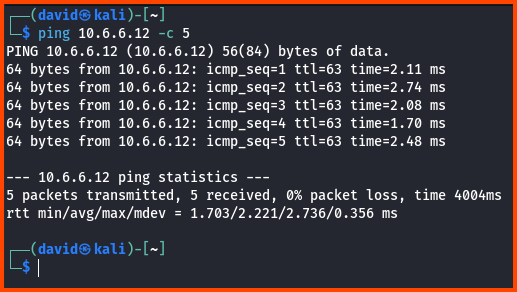
We can also try to reach the Metasploitable 2 VM from Kali Linux.
1
ping 10.6.6.12 -c 5
VM 2: Chronos
Download Chronos
Go to the following URL: Chronos: 1 ~ VulnHub and download Chronos.

The downloaded file is a .ova file.

Creating the VM
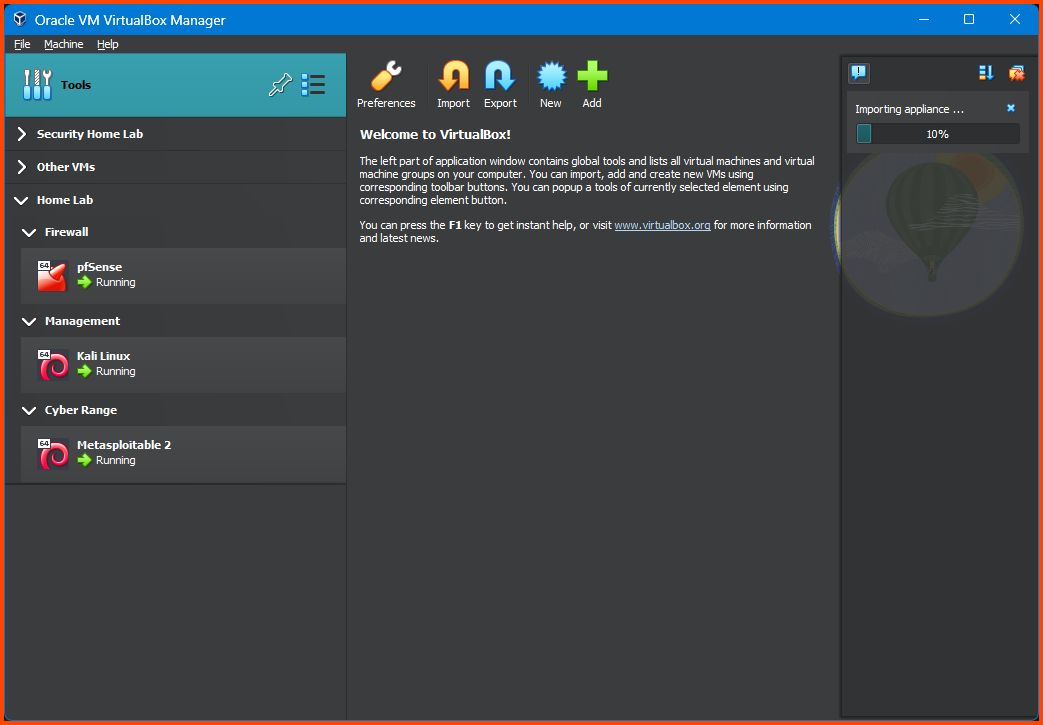
From the VirtualBox sidebar select Tools and then click on Import.
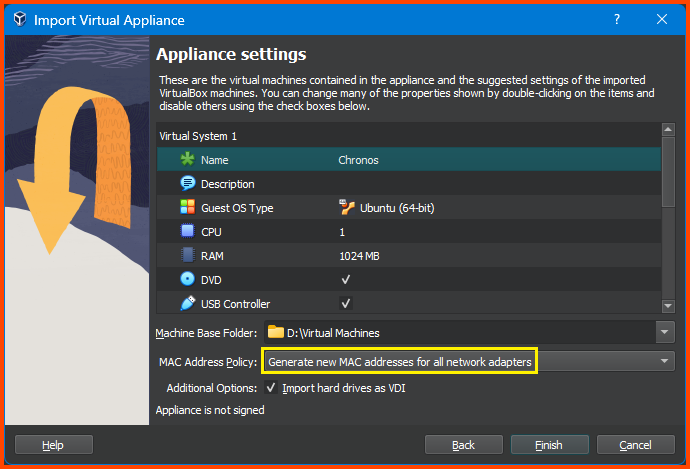
This will open the Virtual Appliance Import wizard. Click on the folder icon to the right of the File field and then select the downloaded .ova file then click on Next.

From this menu, we can change the configuration of the VM as required. I have gone ahead and reduced the RAM to 1024MB. You can change the name of the VM to match your naming convention. For MAC Address Policy ensure that Generate new MAC addresses for all network adapters is selected. If everything looks right click on Finish.
The import process can take some time.
Adding VM to Group
Once the import is complete right-click on the VM and then select Move to Group -> Home Lab/Cyber Range.
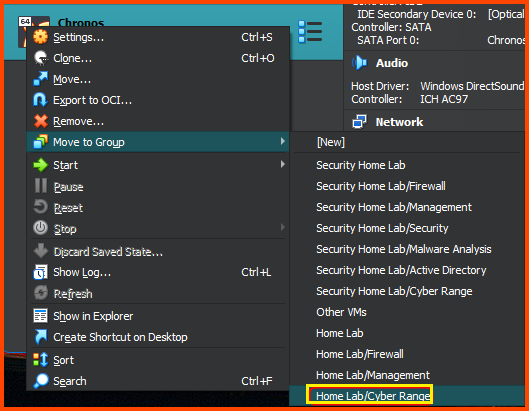
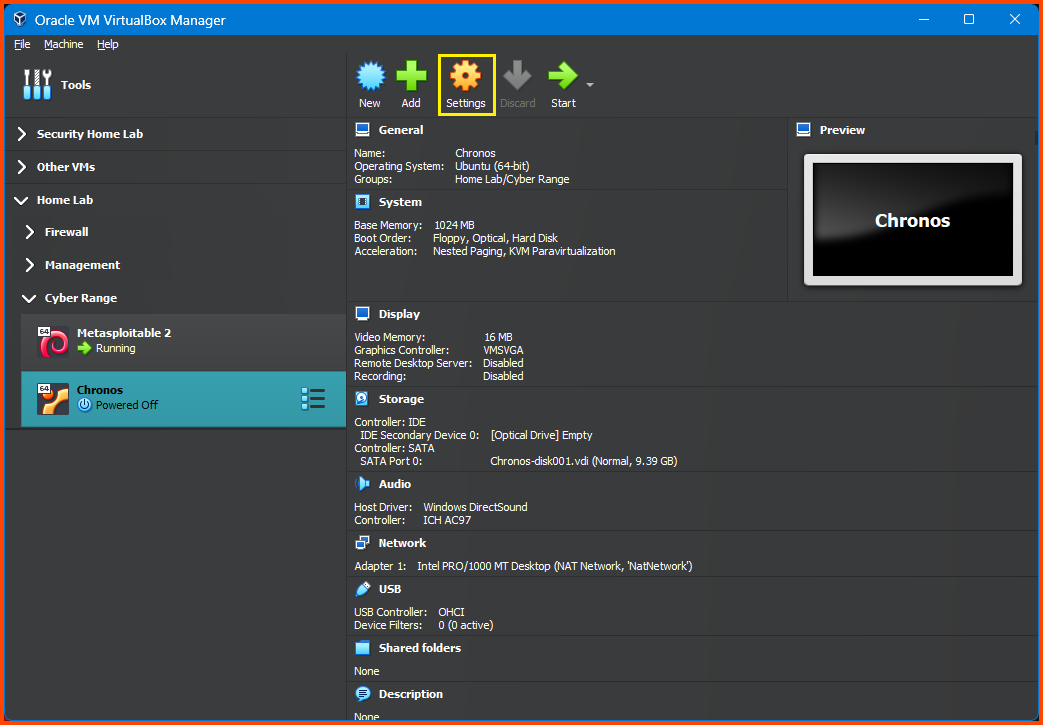
The result result will be as follows:

Configuring the VM
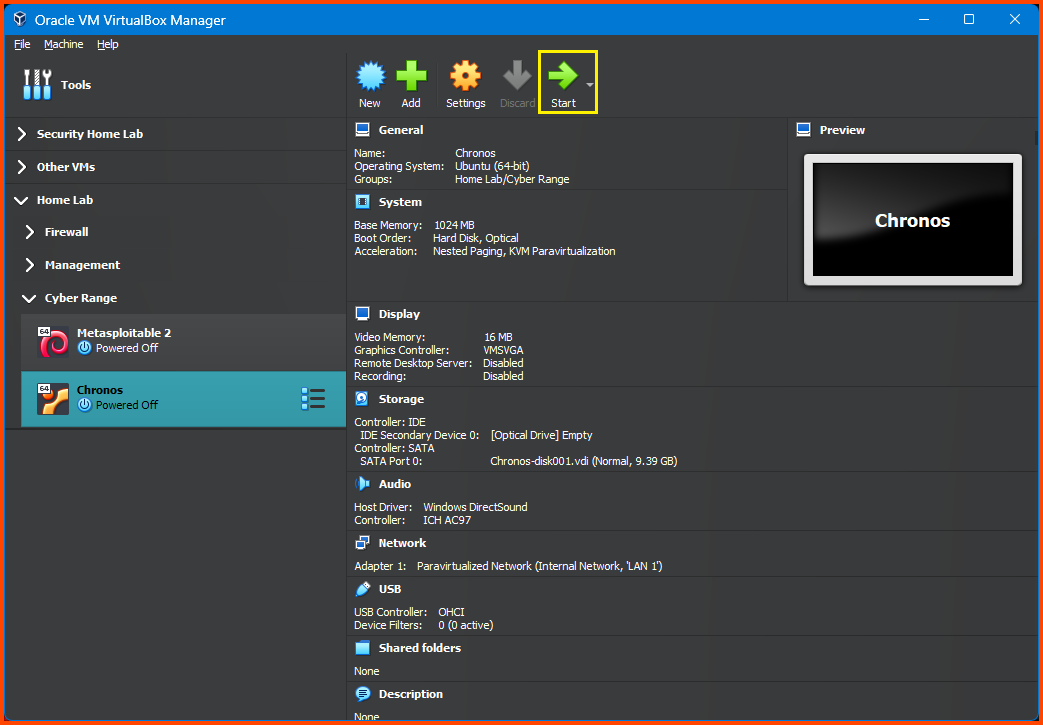
Select the Chronos VM and then from the toolbar click on Settings.
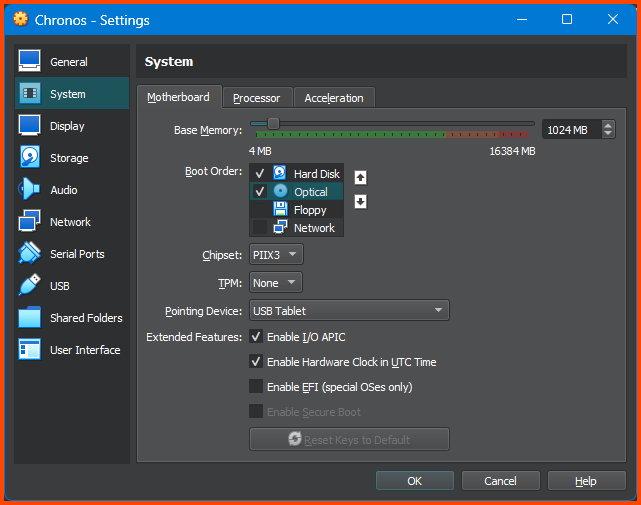
Go to System -> Motherboard. For Boot Order ensure that Hard Disk is on the top followed by Optical. Disable Floppy.
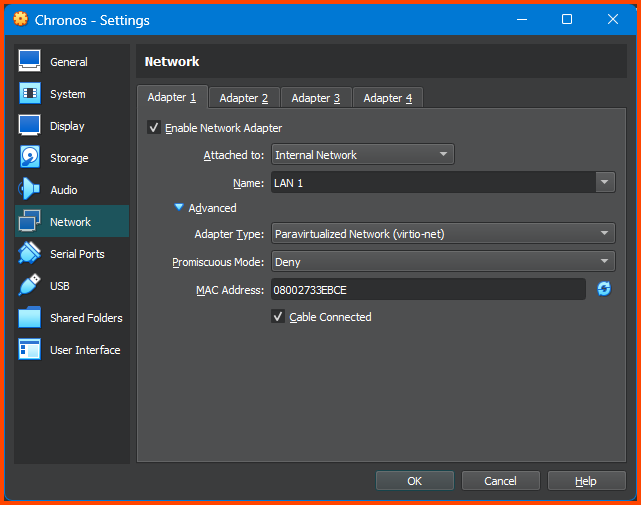
Go to Network -> Adapter 1. For the Attached to field select Internal Network, for name select LAN 1. Expand the Advanced settings option. From Adapter Type select Paravirtualized Network (virtio-net). Click OK to save the changes.
Testing Connectivity
Select the Chronos VM and from the toolbar select Start. Once the VM starts we should see the login screen. The credentials for this machine are not known so we cannot log in and check if it has been assigned an IP address.
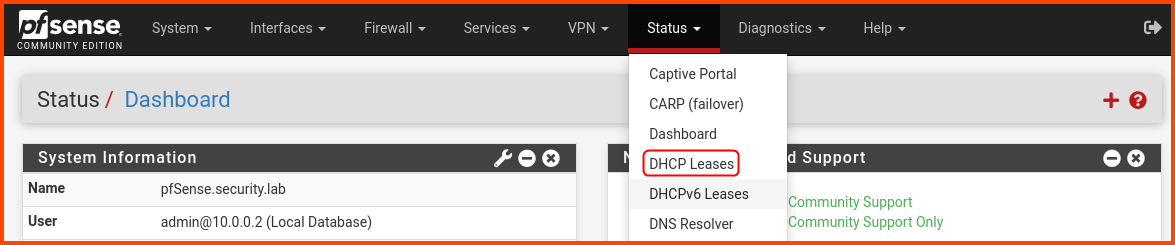
On the Kali Linux VM open the pfSense Web Portal. From the navigation bar select Status -> DHCP Leases.
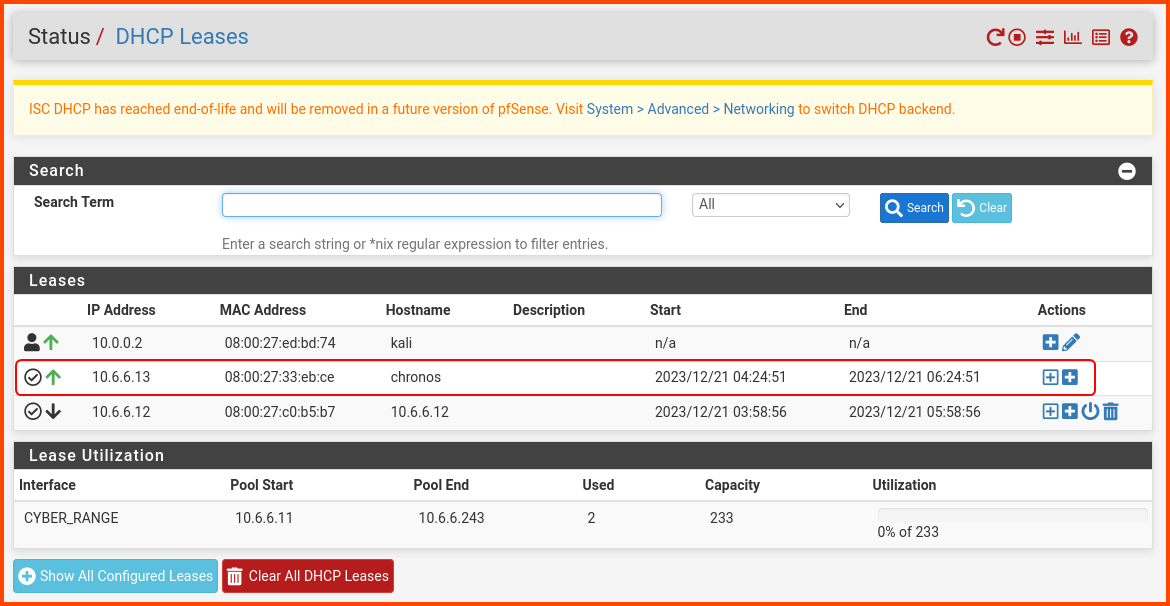
Under the Leases section, there should be an entry for Chronos. We can see that it has been assigned the IP 10.6.6.13.
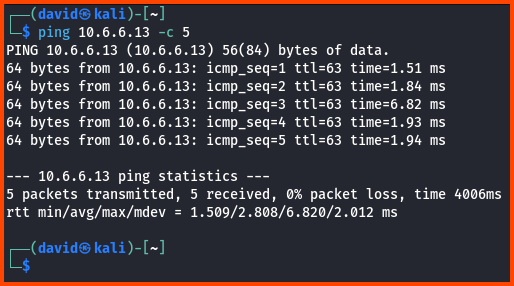
From Kali, we can ping the VM to test if we can connect to it.
1
ping 10.6.6.13 -c 5
Adapter Type Selection
You would have noticed that for the Metasploitable 2 VM we did not choseParavirtualized Network. This VM is quite old and does not work properly on that Adapter. Windows VMs also don’t work onParavirtualized NetworkAdapter.
From a performance point of viewParavirtualized Networkis the better choice. We don’t have a way to know in advance if a Linux VM will work on the Adapter. So what I recommend is to first selectParavirtualized Networkbooting up the VM and check if the network is working properly if not shutdown the VM and select a different Adapter.
In the next module, we will begin configuring the Active Directory Lab.